Home Improvement » Sanders » The Best Drywall Sanders in 2024
Best Drywall Sanders
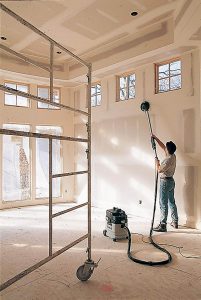
Whether you’re going to texture, smooth, or just put in a patch, you’ll find that a drywall sander is often the best way to go. While they’re not used for much else, the relatively low of the tools and their specialization makes them an excellent investment for anyone who’s planning on fixing their own walls.
Top Pick
Goplus 800W Electric Drywall Sander
With a great price, an in-built vacuum, and enough length on the telescoping pole to get the job done no matter what, this Goplus drywall sander is an excellent choice for around the home. It might not be professional, but an amateur will definitely appreciate the saved time and effort.
In This Article:
The 5 Top-Rated Drywall Sanders
| Editor’s Picks | Brand | |
|---|---|---|
| Best Overall Drywall Sander | Goplus 800W Electric Drywall Sander | |
| Runner Up for Best Drywall Sander | WEN 6369 Variable Speed 5 Amp Drywall Sander | |
| The Professional Option | PORTER-CABLE 7800 4.7 Amp Drywall Sander | |
| Best Manual Drywall Sander | Hyde Tools 09170 Dust Free Drywall Vacuum Sander Kit | |
| Best Sander for Drywall | TACKLIFE Orbital Sander |
Why Use a Drywall Sander?
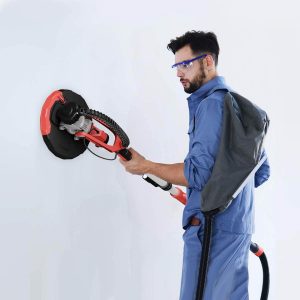
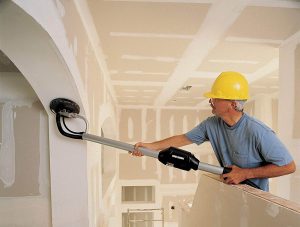
Drywall sanders consist of an extendable pole with an attached power sander. The pole allows the person to cover an entire wall quickly and easily, without having to engage in complex acrobatics or grabbing a ladder.
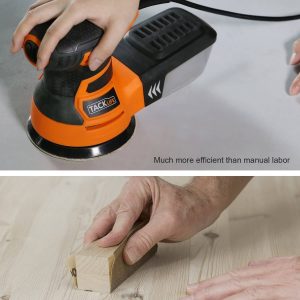
Of course, professionals will want to ensure that they have a great drywall sander on hand, but the amount of effort saved per panel is incredible when compared to using any other type of sander. It also means that you’re not going to have to balance on a ladder while trying to smooth things out.
Basically: if you’re replacing at least one panel of drywall, then one of these pole sanders is a great tool to have around. The smaller models, which we did review a couple of, are generally advised for patching, but you can often make-do if you have a decent orbital or detail sander around the workshop and aren’t planning on regularly doing drywall work.
How We Selected the Drywall Sanders for Testing
When it came time to find out which sanders to recommend, we made some calls and got a few solid products and a bunch of brand leads. We called both handymen and professional drywall installation companies, helping to make sure that we had both products and brands so that we could bring you only the best.
After we had our initial list, it came time to start cutting things down. We used the following to determine which drywall sanders actually made it to the testing process.
Type
Look, when it comes down to it, you can just use sanding blocks if you’re willing to take the time and deal with the mess. We didn’t seriously consider them as a contender; instead, we looked into sanders which are made specifically for drywall.
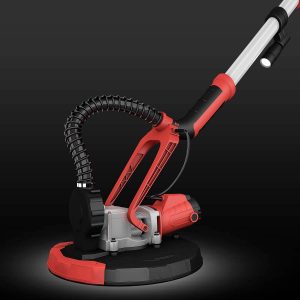
Turbo sanders which… well, they don’t really look like most sanders.
They have an extendable boom that lets you reach corners, a big vacuum bag for gathering dust, and are a lot more expensive than their counterparts. Most of our research centered on these since they’re really the absolute best for drywall jobs. Professional or amateur, we’d recommend finding one that’s a good fit if you’re doing serious remodeling work.
We also tested a few smaller orbital sanders alongside these, with a particular focus on good dust collection.
Which type you want to use in this case largely depends on your budget and needs. For small repairs, we recommend an orbital or other handheld sander which will help you smooth things out quickly, but you’ll want to put some thought into a vacuum or turbo sander if you’re planning on doing serious remodeling.
Power
The power of a drywall sander is measured in amperage.
While it’s necessary on most sanders to have a variable speed control… we didn’t see much of a point with drywall sanders. They’re primarily useful if you need to slow down the amount of dust being generated, but apart from making sure they worked, it didn’t come up in our testing.
Just be aware that a more powerful sander also needs a better internal vacuum, or the dust is just going to end up everywhere. Drywall mud is a uniform material, so knowing your sander will end up being much more important than being able to change the speed it runs at.
Pole Length
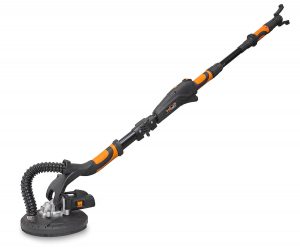
If you’re planning on working in an area with particularly high walls, however, there are booms that can extend up to 13′ available. That should handle three standard-sized drywall panels with ease. We weren’t able to find any that went much further than that, so if you’re really working high, you’ll be wanting to make sure you have a solid ladder available as well.
Build Quality
For the most part, turbo drywall sanders tend to be well-built. Durability is rarely an issue for DIY projects, but for those who are planning on using them professionally, an upgrade may be in order.
Pole sanders with a vacuum port are almost interchangeable, the only point of failure being operator error or a bad port. Comparison shopping is the way to go if you don’t need a power sander for a single job.
How We Tested Our Drywall Sanders
When it came time to test our sanders, it took us a bit to come up with a worthy test of real-world use.
So, we framed a wall in the shop and then attached drywall. After each iteration, we used the sander to smooth things out with a 150 grit pad or disc, depending on the model being used. We’d then scrape off the mud and place another fresh layer.
In the end, we went through six different power pole sanders, three elliptical, and two vacuum ported pole sanders during our testing.
Overall Observations
Since the definition of a drywall sander varies, it’s hard to make a direct comparison across the board on all of the available models. As a general rule, we found that turbo sanders had more variance due to their complexity… pole sanders were pretty much all the same. We just picked the one with the best vacuum port for our list after testing a few of them.
Due to the labor-intensive testing, we didn’t run any long term durability tests.
We can confidently say that for many people, a pole sander will be fine. It takes more effort to run, but the difference in cost made up for it readily. If you’re only planning on doing a couple of panels, they’re a good choice.
Elliptical sanders, compared to using blocks, took up very little time, but they’re hard to use as you get higher up. The nice thing about them is that they can be used for a wide variety of different tasks, while pole sanders of both types aren’t really useful outside of handling drywall mud.
Testing Results
After testing in this case, we found our favorites.
In this case, the following were our top picks for drywall sanders:
- The Goplus 800W Electric Drywall Sander was our favorite for home use. Eschewing some of the expense of professional models, it’s a solid pick for small home jobs.
- Meanwhile, the WEN 6369 Variable Speed 5 Amp Drywall Sander was our runner up. The build quality is slightly less, but it has a longer hose to make the job easier.
- The PORTER-CABLE 7800 4.7 Amp Drywall Sander was easily the best of those we tested. Unless you’re willing to shell out $500 or more for a highly specialized brand like Festool, this is the choice for big jobs and professional use.
- For pole sanders, our favorite was the Hyde Tools 09170 Dust-Free Drywall Vacuum Sander Kit, which has a great vacuum port, a long hose, and makes clean up a snap although you’ll have to do the sanding by hand.
- And lastly, for smaller patch jobs and just having an orbital around the house, you may want to pick up the TACKLIFE Orbital Sander. It’s cheap, easy to use, and works great as long as you don’t have to hit a corner, though those more invested in a multi-purpose sander may wish to check out their options if they’re planning on sanding multiple surfaces on a regular basis.
Altogether, we feel these represent some great sanders for drywall, no matter what your final intended use is. Keep in mind that the powered pole sanders are… well, they’re kind of useless outside of super-niche use, but they can save a lot of effort on cleanup and sanding while being used.
Author:
Popular Articles:
Top 5 Pole Sanders
As usual, we’ve presented a broad spectrum of tools to make sure that you’re covered no matter what your intended usage is. Take a look and see if you can’t find the perfect drywall sander on our list.
Best Overall Drywall Sander
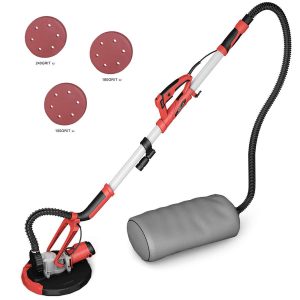
Goplus 800W Electric Drywall Sander
- Power: 6.6A
- Pole Size: 47.2” to 66.9”
- Head Size: 8.6”
While it uses a relatively uncommon size of sanding head, we feel that this one from GoPlus is perfect for DIY use. Whether or not it would hold up to daily, professional use is kind of out in the open, however.
That said, this is a great option. The pole easily telescopes to a length where even a child could hit the whole wall, it has a decent amount of power and has a built-in vacuum and bag to make the job easier.
It’s variable speed, for what that’s worth, although we found it worked well when running the high setting throughout our testing. The balance is pretty good even when the pole is extended to the maximum as well, which was what pushed it to the top of our list.
We recommend going a bit more expensive if you’re planning on daily use of the tool, but we’d say it’s usable for almost any home job. You’ll also need a vacuum around despite the included one, while it cuts down on fine particulate by about 75-80% there’s still going to be a considerable amount of it left on the floor.
Our Opinion:
For those who need a turbo drywall sander to take care of tasks around the home, this is a great pick. Just be aware that it may not hold up over an extended period of daily use.
- Lightweight at 9lbs
- Extendable pole
- Built-in vacuum, no shop vac needed!
- Excellent quality for the price
- Probably not the best for daily use
- Not “dust-free”
Runner Up for Best Drywall Sander
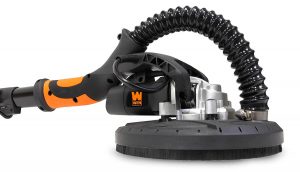
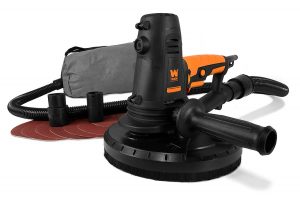
WEN 6369 Variable Speed 5 Amp Drywall Sander

- Power: 5A
- Pole Size: 59”
- Head Size: 9”
For those who want to save a few bucks, WEN has this excellent drywall sander, which barely missed out on top marks. It’s a solid choice, especially for those who don’t mind the sometimes worrying builds of WEN tools. We stand by it as a solid piece of work, even if it feels a bit cheap in the hand.
The big thing here is that it’s a bit lacking in power as well. It’s not the quickest, it’s not telescoping, but it is a solid piece of equipment which makes short work of drywall and paired with a shop-vac it resulted in a 90%+ reduction in dust which was more than our top pick.
For single panels, this would be our top pick, but for larger jobs, you’ll want to invest in something a little bit more substantial. Keep in mind this one doesn’t have an in-built vacuum so you’ll also need a shop vac to take care of the problem.
The filters also need frequent cleaning, which makes it a pain for larger jobs but perfectly suited for just a wall or two. Just keep that in mind if you start to see the dust flying.
Our Opinion:
While a bit under-par as far as build quality goes, this is the cheapest effective drywall sander on the market. If you're okay with the limitations, then you've found exactly what you need for smaller jobs around the home, however.
- Dust collection system works great
- Easy to use
- Excellent price for quality
- Great power to weight ratio
- Filter needs to be cleaned very frequently
- Mediocre build-quality
The Professional Option
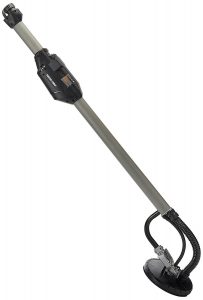
PORTER-CABLE 7800 4.7 Amp Drywall Sander
- Power: 4.7A
- Pole Size: 60”
- Head Size: 9”
Porter-Cable makes great tools across the board, and this one is no exception. Coming in with a surprisingly high RPM for the seemingly low power and excellent build quality, this is a professional-level drywall sander.
The price also reflects it. We don’t recommend shelling out the money if you’re looking at only a single wall or a few occasional jobs, but for those who make a living with their tools, this is one of the best around.
The variable speed is nice, if not completely necessary, in most cases, and it actually tore down mud faster than many seemingly higher-powered options. We found it was solid in the hand and much slower to overheat than the majority on our list.
It’s… better. All the way around, unless you’re going to go out and buy an $800+ Festool, it’s hard to recommend anything else for professionals. Unfortunately, you’ll also need a separate vacuum in this case.
Our Opinion:
The best of the best, this professional-level drywall sander is awesome all the way around until you see the price-tag. Still, for professionals or those who are planning on doing an entire remodel, it's hard to recommend anything else, so snatch it up if you fit the bill.
- Perfect pole length
- Surprisingly powerful for lower amp draw
- Best built of those we tested by far
- Skirt to prevent wall gouging
- Expensive
- No in-built vacuum
Best Manual Drywall Sander
Hyde Tools 09170 Dust Free Drywall Vacuum Sander Kit
At a Glance:- Pole Length: Variable
- Head Size: Takes ½ sheets of sandpaper
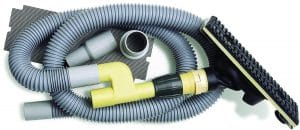 As far as a manual sanding head goes… it’s perfect. All of the drawbacks come from the style of sander it is and their inherent limitations rather than coming from problems with the tool itself.
 Our Opinion:
For those who are comfortable getting down and dirty, this kit from Hyde Tools offers your best bet. Just make sure you pick up a pole to go with it, although it’s not necessary if you’re planning on handling a smaller patch.
- No power required
- Great head for corners
- Easy to use
- Almost no mess
- Takes considerably longer to use than power sanders
- Hose can be a bit short for large jobs
Best Sander for Drywall
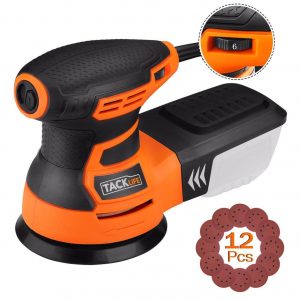
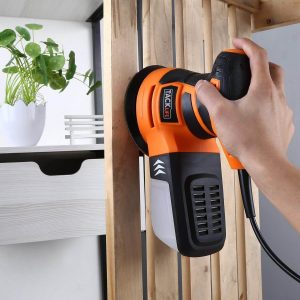
TACKLIFE Orbital Sander
 At a Glance:
- Power: 3A
- Pad Size: 5”
- Vacuum Port: In-built
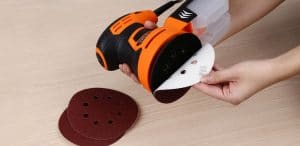 We always recommend finding tools that have multiple uses around the home for those who are doing small jobs. It just increases the chances that you’ll be buying something you actually use rather than just taking up space after the first job.
It’s not perfect. As an orbital sander, it’s actually fairly middle-of-the-line but the price, dust port, and small size meet-up to make for an excellent end-user experience. One big tip: keep the speed setting relatively low if you don’t want to make a huge mess, the 13,000RPM top-end is way too much for drywall mud.
Our Opinion:
For small patch jobs, there's no reason to spend over $100 on a turbo sander. Instead, consider picking up this small orbital, which will surely prove to be useful for other tasks around the home as time goes on.
- Lightweight and powerful
- Small pad for smaller jobs
- Great dust collection in-built
- Convenient and ready-to-use for other applications
- Not really the tool for big jobs
- Relatively middle-of-the-line as an orbital sander
The Nitty Gritty: Making Sanding Drywall Painless
For most, sanding drywall is a task to dread. It takes a lot of effort, even if you’re using a power sander, and tends to make an enormous mess.
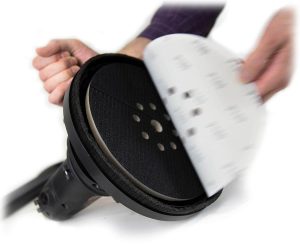
Prepping the area is essential if you’re working in a home that has already been constructed. Dust covers are ideal for furniture, which is too large to move but get all of your nick-nacks and decorations out of the way as well unless you really like scrubbing dust out of every corner.
Depending on your floors, you may also want to use a painter’s drop cloth. Some dust is inevitably going to creep out around the edges, but if you’re careful when rolling it back up, even a manual sander with no vacuum can do a job that’ll be cleaned up in a few minutes instead of an hour or more.
A box fan in the window can be a big aid in moving the dust outdoors and minimizing cleaning as well.
Remember to cover vents, as well. Your central heating and air conditioning are great… but they’re also linked through the home, and any dust that ends up in there is going to be spread through the home rapidly.
Make sure to use proper PPE as well. Goggles and a dust mask are recommended at a minimum. Some people use disposable Tyvek suits during the sanding process, but that can be a bit much for the home DIYer. Just don’t wear anything you’re worried about getting dirty during the process.
One thing to be aware of with pole sanders: the heads have a tendency to flip. Unfortunately, far from just being a pain, it can also cause gouging in the mud, which will be obvious from across the room. Be careful to keep the head locked against the surface.
You may want some 150 grit sanding sponges as well if you’re using a power sander of some kind. These will let you get in corners if necessary while you use the drywall sander for the bulk of the wall.
Wait about fifteen minutes after sweeping to vacuum to give the dust time to settle.
For the final dust, use a microfiber cloth if you have a hard floor. Otherwise, use the corner attachments on a vacuum to get all of the dust possible from the floor, baseboards, and other areas that are hard to get the vacuum in.
Forethought is key. If you just start sanding without a plan for clean-up, then you’re already in for a long night of vacuuming and wiping things down.
Drywall Sander FAQ
Here we are again. Questions, answers. You know the drill; if we didn’t answer your question here, then be sure to leave us a line in the comments and our team will get back to you ASAP.
What’s the best grit for sanding drywall?
In our experience, 150 is just about perfect for a normal wall. It’ll bring the mud down rapidly and allow for a relatively uniform surface free from the scratches of smaller grits. 220 is also a good choice for those looking for exceptionally smooth walls.
What should I do about corners when sanding drywall?
If you’re using a power sander with a round head, then you’ll need some sponges or paper to clean up corners properly. It’s just the way things go, we recommend using 3M sanding sponges in 150 grit.
How hard is it to use a pole sander?
Our reviewers got the hang of it pretty quickly, but we still had some gouging before the day was done. For your own home, the most important thing to be aware of is the balance of the head. Fortunately, those with vacuum ports are often much less prone to flipping suddenly since they’ll have a vacuum attached.
What type of shop vacuum should I use with my drywall sander?
During testing, we used a cheap name-brand model, but pretty much any shop vac should handle the task readily. Just make sure that you can fit the port and you’ll be good to go.
Can I wet sand drywall mud?
Yes, you can actually. However, it’s not a good idea in carpeted areas since the mud will tend to cling to the fibers. For hardwood floors, tile, or concrete, it’s an excellent option since it tends to reduce airborne dust, and mud is much easier to clean. The easiest way to do it is with a five-gallon bucket and a sponge or rag. Just dip and wipe the wall frequently while sanding and apply more water when you see dust go airborne. It’s extremely important that the mud be thoroughly dry before sanding, so give it an extra bit of time to dry when sanding.
Make Patches and Panels Hassle-Free
So, while you’re gearing up for that remodel, why not pop over and pick up a great drywall sander now rather than later?
Author:
Popular Articles:

